|
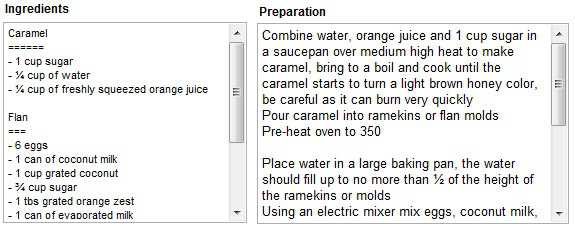
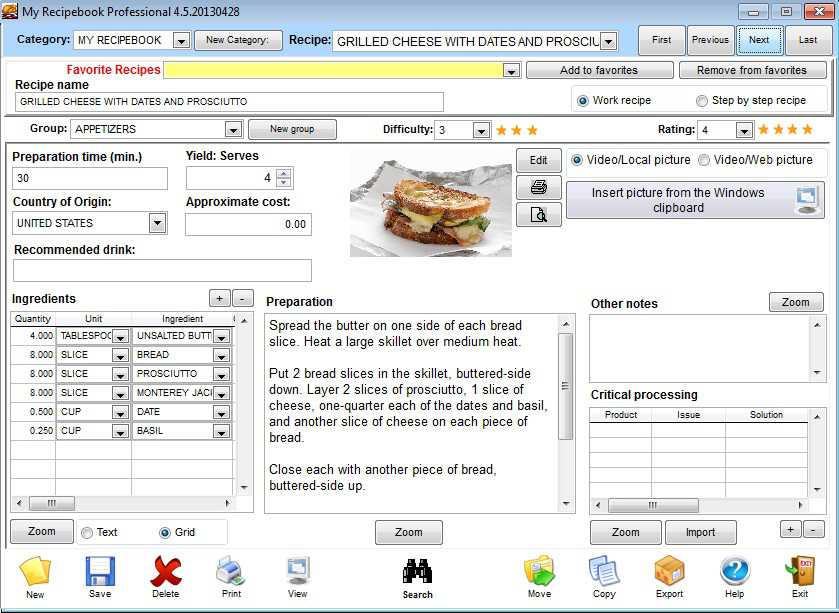
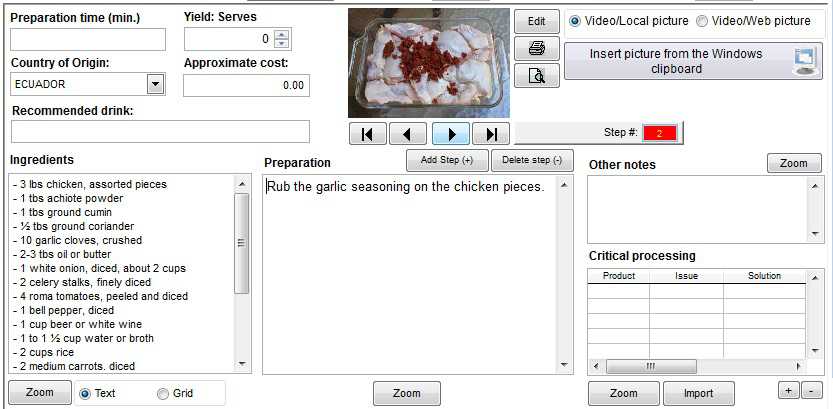
Recipe Manager View video sample on youtube.com --- View sample on Flash video In this option you can create - edit - delete, and export recipes. (The recipes can also be added from the Web browser if you have an Internet connection) To create a new recipe must select the category which would link this recipe. Then press a click on button NEW. Now we need to enter the name of the recipe, Duration (aproximate time), Yield / Servers, Approximate cost (in local currency). You can select the recipe rating between 1 and 5: 1 is Bad and 5 is excellent. Also you can select the difficulty level for this recipe, from 1 to 5, 1 is difficult and 5 is easy. In the recommended drink field, will allow you to enter a recommended drink for the current recipe. Also include the country of origin of this recipe if you do not know can leave this field blank. One advantage is that you fill in the search option also allows you to search by country. We can type in the ingredients directly into the box or press the EDIT buttom located under the box Ingredients. The ingredients can be entered into a text box or GRID mode. See below for more information about the Grid. Then enter the preparation in the same way we enter the ingredients, and if we have any special note you can include in the field OTHER NOTES. Only the recipe name is mandatory to create a recipe
If you have a photo of the recipe, you can to include, by
clicking in the EDIT button located under the photo. There
will select the path and name of the photo.
The PRINT button: This buttom will send the current recipe
to the printer.
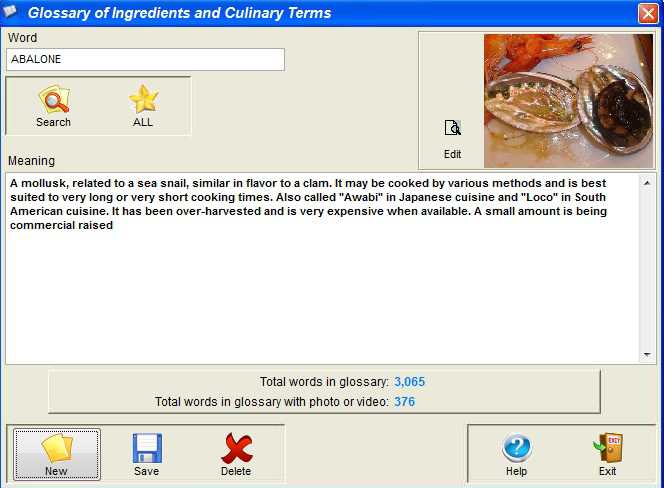
We open the culinary terms administrator in a new windows.
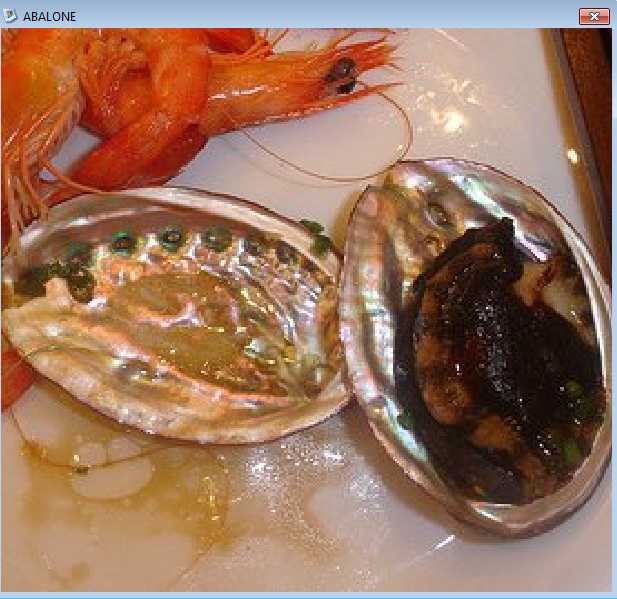
If you want to see the picture in a larger size, only need make two clicks on the image, this will open a new window with the image in a larger size. You can stretch the image to the size you want. Example:
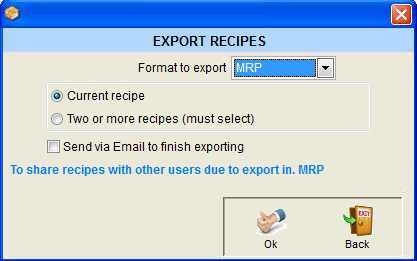
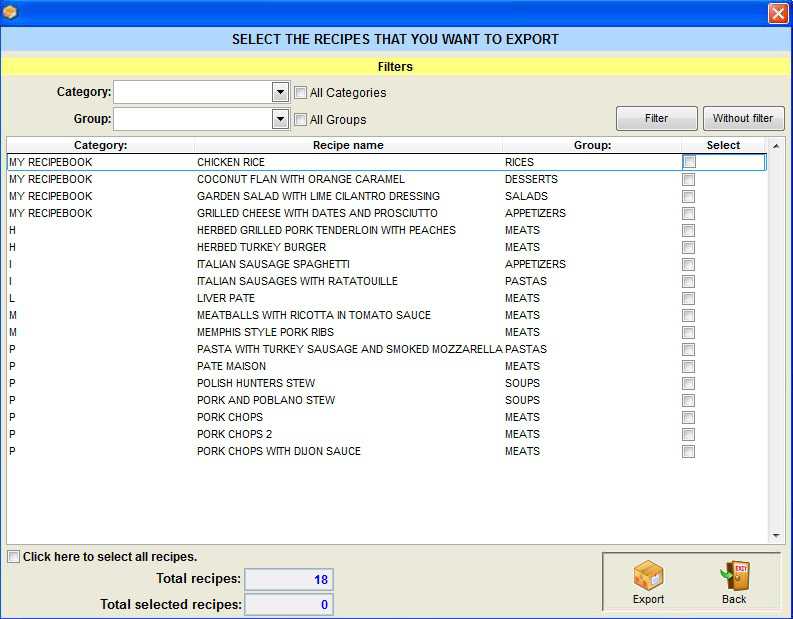
EXPORT RECIPES:
Here we need to select the format you want to export the
recipe. Also, if we want a recipe or several recipes
specify. - If you check the box: SEND BY EMAIL AFTER EXPORT,
we will send this recipe attached for your email account.
Using Outlook Express, Microsoft Outlook or Novell
Groupwise.
In this option must select TWO OR MORE RECIPES and then
click on the OK button. This we will display the following
window.: (Here you have to select the recipes you wish to
export. Then press a click on the buttom EXPORT) - When do
we ask the directory where you want to save the exported
recipes.
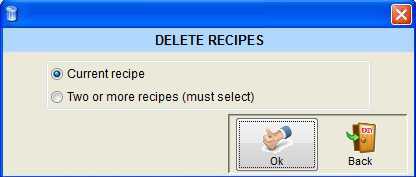
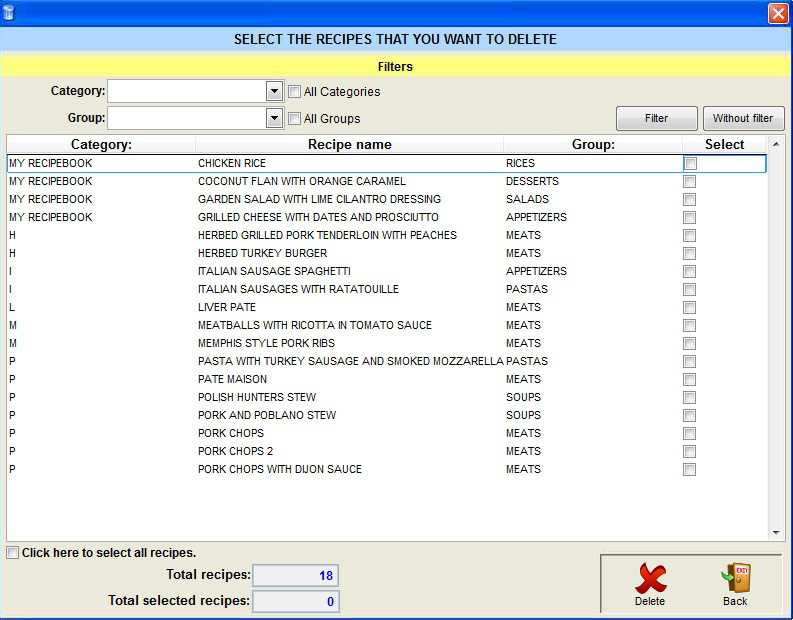
If we want to delete the current recipe must only pressing click on the OK button. If we remove more than one recipe. Select the option TWO OR MORE RECIPES pressed then click on the OK button. We get the following window: Here we select all the recipes you wish to remove. Then click on the button DELETE.
To delete a recipe we just have to press click on the delete
button.
That would be step # 2 and later:
Button: INSERT PICTURE FROM WINDOWS CLIPBOARD, this lets you
without the need to first save the photo to include in the
recipe. All you need to do is copy any picture to the
Windows Clipboard, even of the Internet, and then press this
button, immediately the photo will be included in the
recipe.
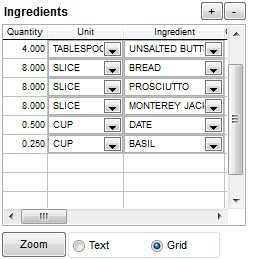
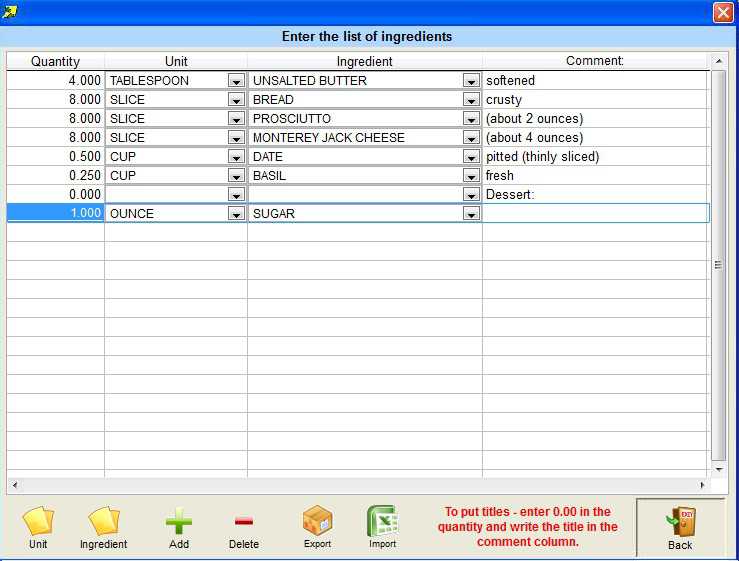
When creating a new recipe this is preset to enter the ingredients in text mode. To enter them in the grid, we need to click on the GRID option. We recommend you click the EDIT button, this will display a window as follows:
Here we enter the recipe has many ingredients.
|
Monday, June 6, 2011 17:19
More Website Templates at TemplateMonster.com!